
3D rendering can be a massively time-consuming process for artists, which can tie their primary machine into render cycles. That means having to wait until a render is done before moving onto the compositing process.
This is why it’s important for 3D artists to always prioritise making the most efficient use of a render system possible, especially when they’re in the early stages of the look development process. Look development is best served when an artist can quickly develop numerous alternatives, which they can then refine to a few key options.
You may like
Expert tip: Using Cryptomatte renders
With a Cryptomatte AOV, an artist can create custom mattes, which will enable them to quickly create multiple variants based on the two render elements.
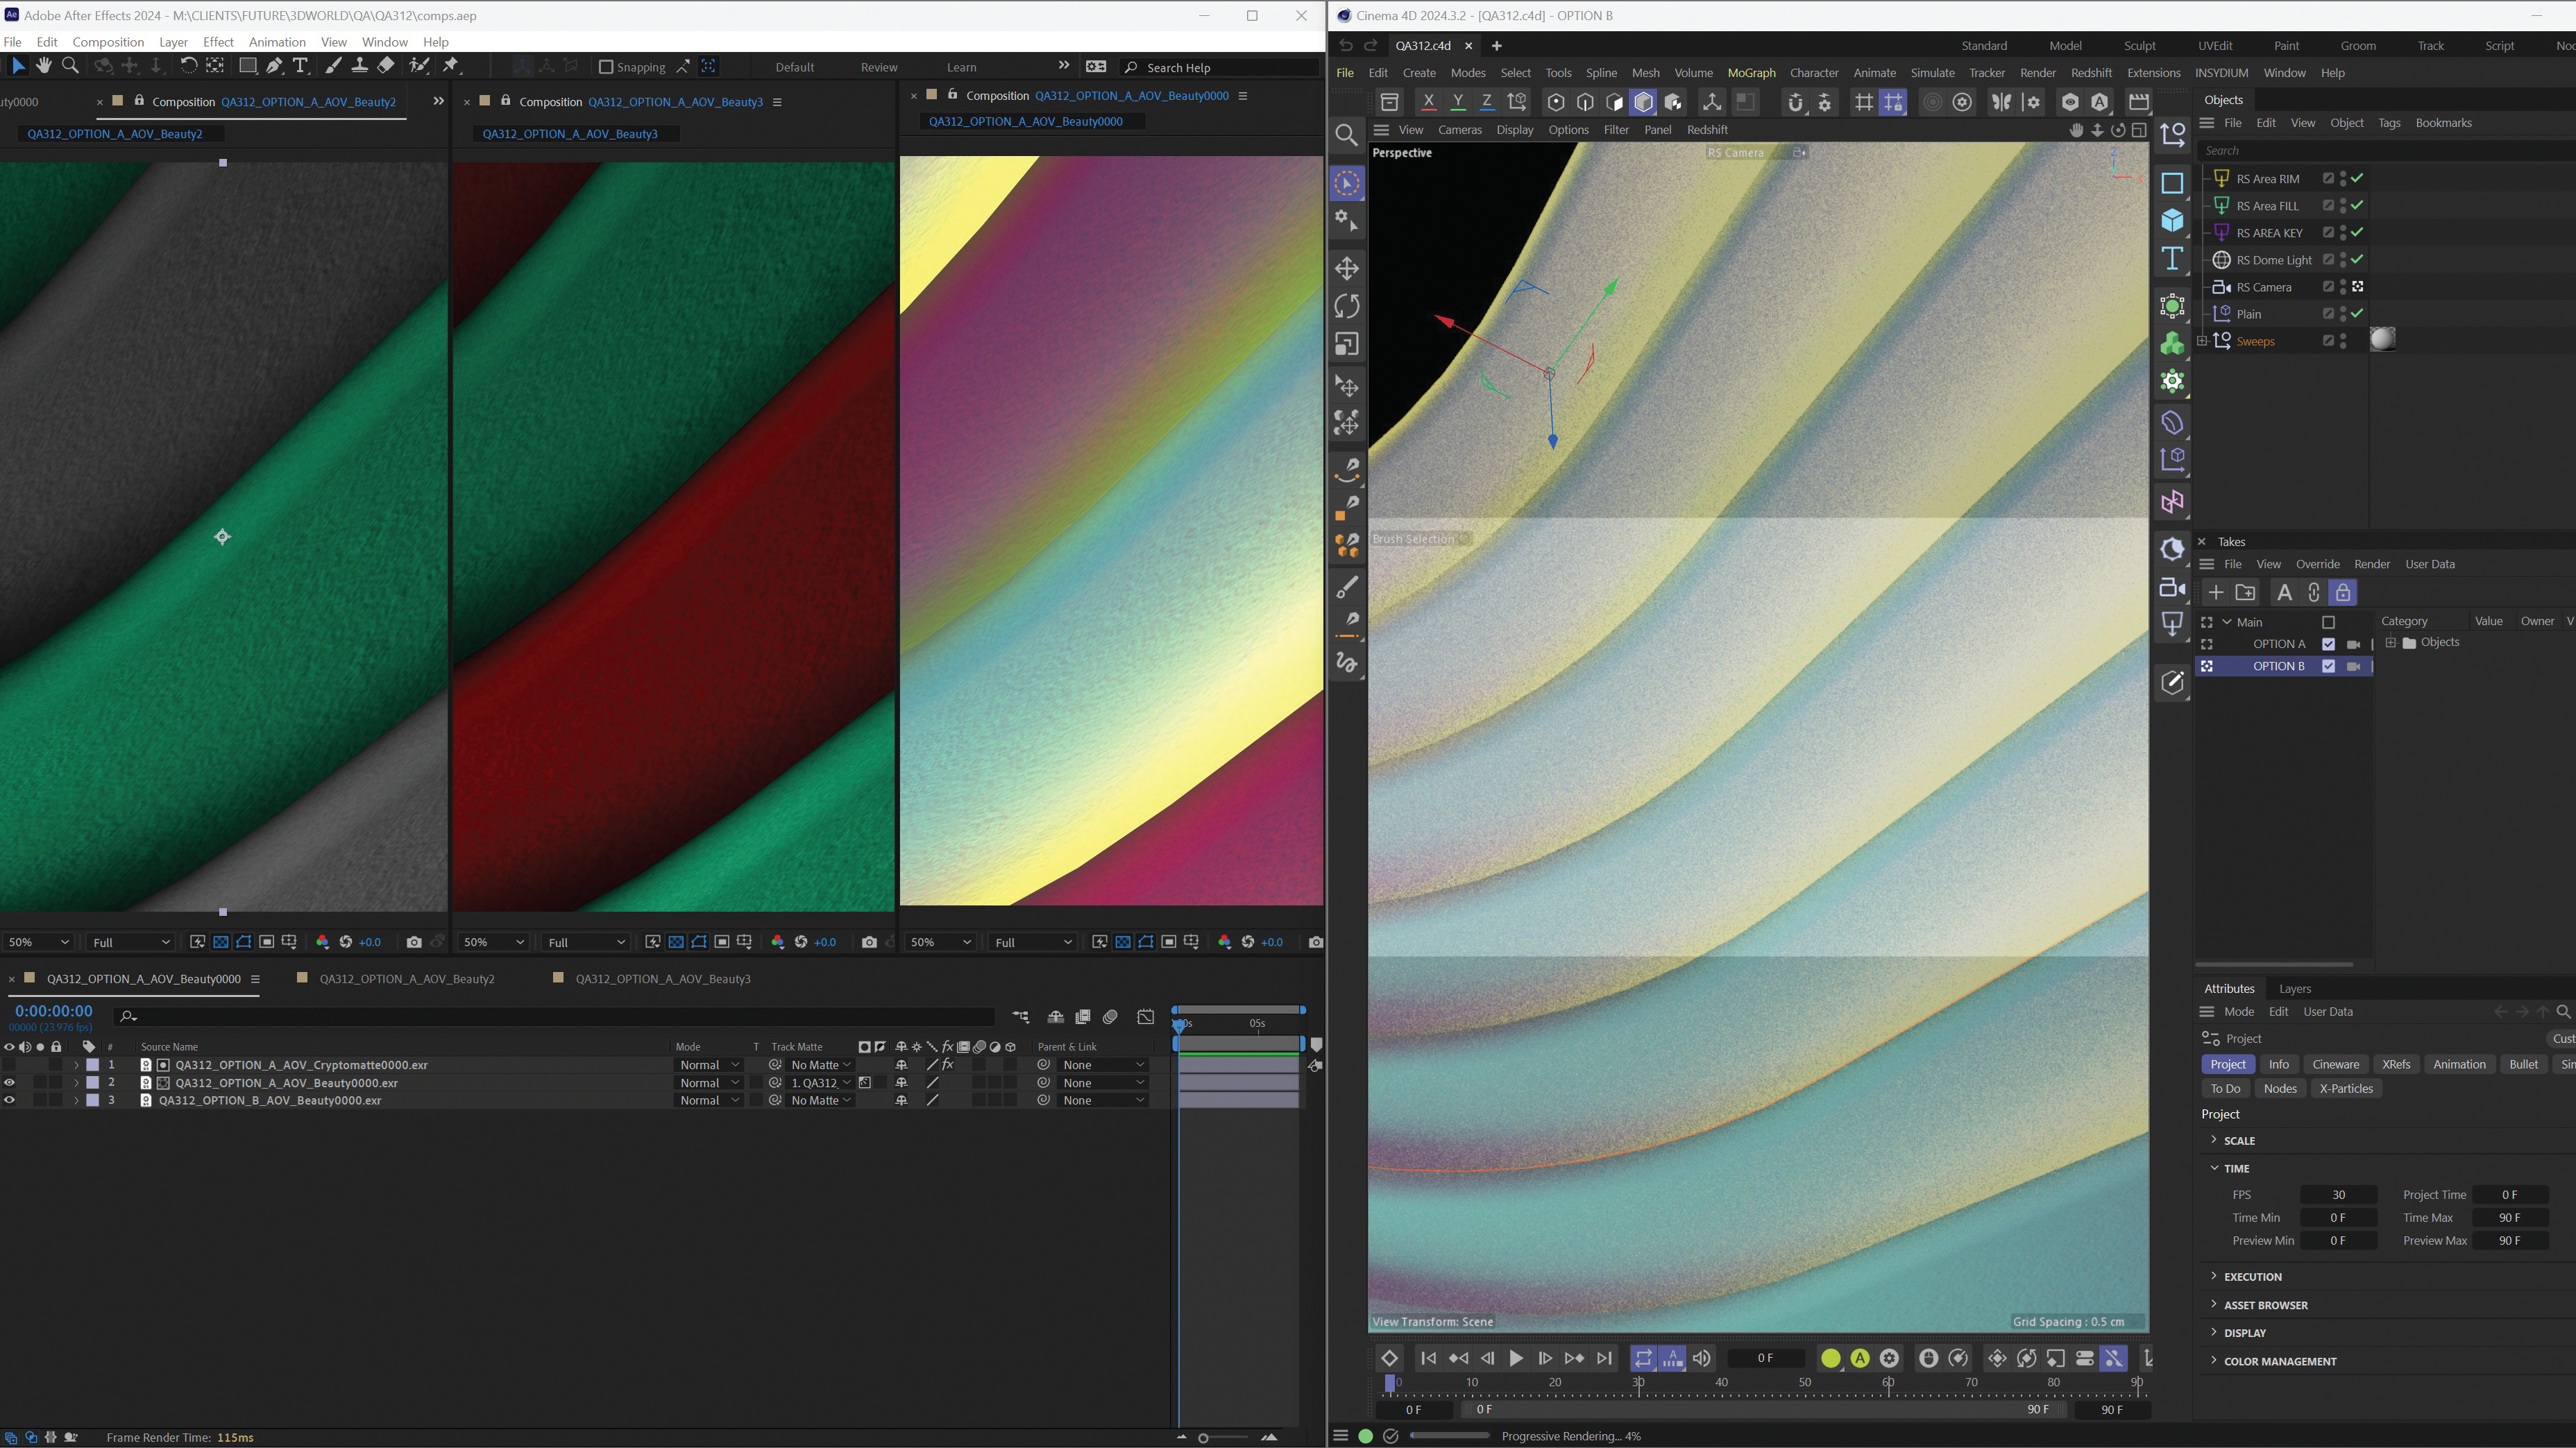
01. Set up the scene
In this simple example scene in Cinema 4D 2024 – which uses Redshift to render, a series of Sweep objects lit with key, fill, rim and dome lights – each of the lights has a distinct colour, creating a potentially shocking image. Even though a normal lighting situation will work with most setups, this example has been made extreme in order to highlight the differences between the lights.
02. Add a light to a light group
To add a light into a new or existing Light Group, select the light and go to the Details tab in the Attributes palette. In the AOV Light Group dropdown, select ‘Add New Light Group’, which you can then give a logical name. If you wish to add a light to an existing Light Group, simply choose the name of the particular group that you want it added into.
03. Create light group AOVs
To create the separate renders for the Light Groups, in the Redshift AOV Manager (RedShift>RS AOV Manager), make sure a Render AOV has been added that works with Light Groups, such as the default Beauty Pass. Select the Light Group you wish to add, or tick All to make sure an AOV pass is created for each Light Group in the scene.
04. Make another look
The Takes palette, by default a hidden tab by the Objects Manager, can easily be dragged below the Objects Manager. Make a new take to keep the current settings and give it a distinct name, then create another and select a light. In its Attributes palette, choose the colour, then in the contextual menu hit Override and change the colour. Click the checkboxes for the two takes and render with the Render Marked Takes option.